This blog is written by Roy Jamil, Embedded Systems Training Engineer at Ac6.
Reorganizing logical applications into separate modules
Introduction
In the first part, we covered the fundamentals, highlighting the security and stability benefits of user mode through memory domains and partitions. Building on that foundation, this article delves deeper into the practical implementation of these concepts. We will demonstrate how to refactor our initial example, moving from manual variable placement to a modular code structure that automatically allocates variables to the appropriate partitions. The purpose of this change is to simplify development and enhance the scalability of larger applications. Let’s delve into the specifics and discover how to integrate these upgrades effortlessly into your Zephyr projects.
Extra modules in a nutshell
A Zephyr module is essentially a standalone repository that conforms to specific requirements set by Zephyr to seamlessly integrate additional software components with the main Zephyr codebase. These modules can include a variety of functionalities such as hardware support, middleware, libraries, or device drivers that are not part of the core Zephyr kernel.
Each module includes a module.yml file located inside a zephyr folder, which provides information about the structure of the module and tells the Zephyr build system how to interact with it. The module’s components are compiled into a separate lib<module_name>.a file and then linked as part of the final application.
The main application finds additional modules by using the EXTRA_ZEPHYR_MODULES variable, which can be added to the main application’s CMakeLists.txt file. This setup facilitates organized and scalable project development.
Reorganizing Logical Applications into Separate Modules
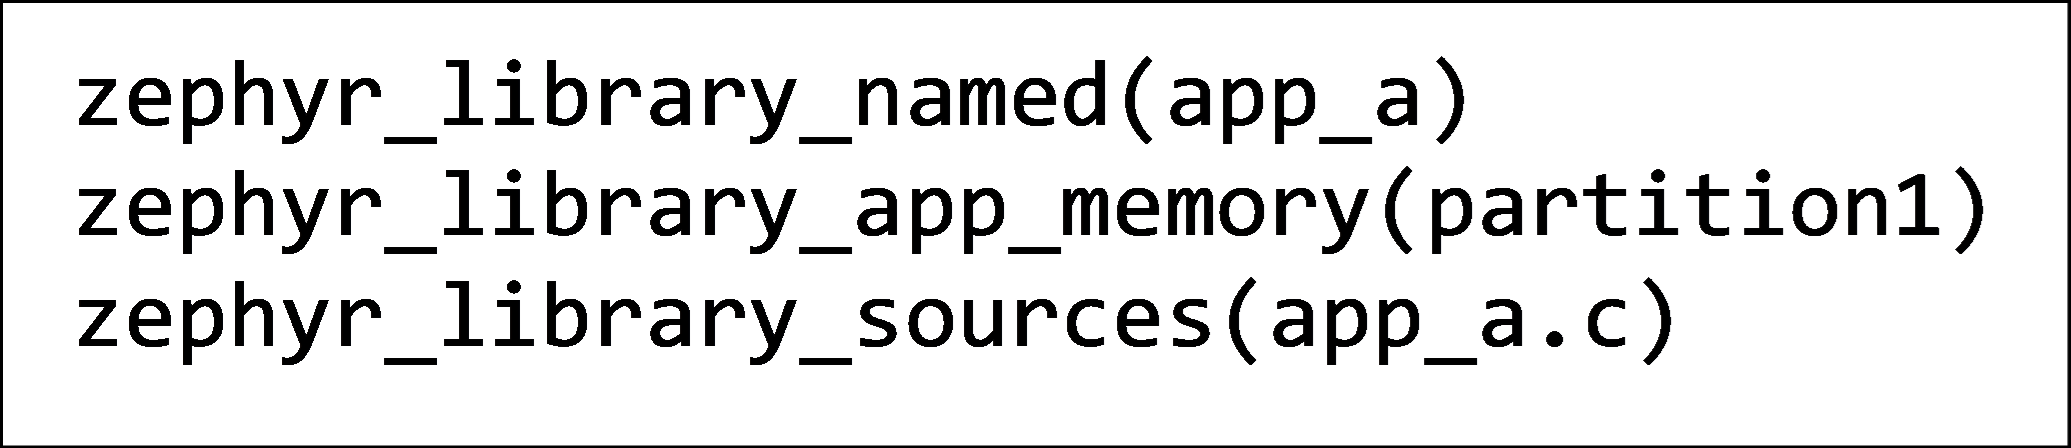
A module will be used to separate each logical application into its own module, and the build system will be informed that everything in this module belongs to a specific partition. The Cmake function “zephyr_library_app_memory(partition)” is used to indicate that all variables of this module should be placed in the specified partition.
From the main application, partitions and memory domains will be created and configured, and threads will be added to the appropriate memory domains. The main advantage of using zephyr_library_app_memory(partition) is that it eliminates the need to explicitly and manually specify the placement of each variable using K_APP_DMEM(partition) and K_APP_BMEM(partition), reducing the risk of forgetting to write them, which could lead to security risks or misuse.
Another advantage of separating logical applications into different modules is that it reduces the risk of unintended access to these variables, as they are not directly exposed. This approach enhances the security and maintainability of the application by clearly setting the boundaries between different logical components.
Practical example
This code was tested on NXP FRDM-MCXN947. Check this github repository if you want to clone the project.
In the main CMakeList.txt you should set EXTRA_ZEPHYR_MODULES to the path of the modules:
set(EXTRA_ZEPHYR_MODULES “path/shared” “path/app_a” “path/app_b”)
The CMakeList of each module (here module A) should specify the partition using “zephyr_library_app_memory”:
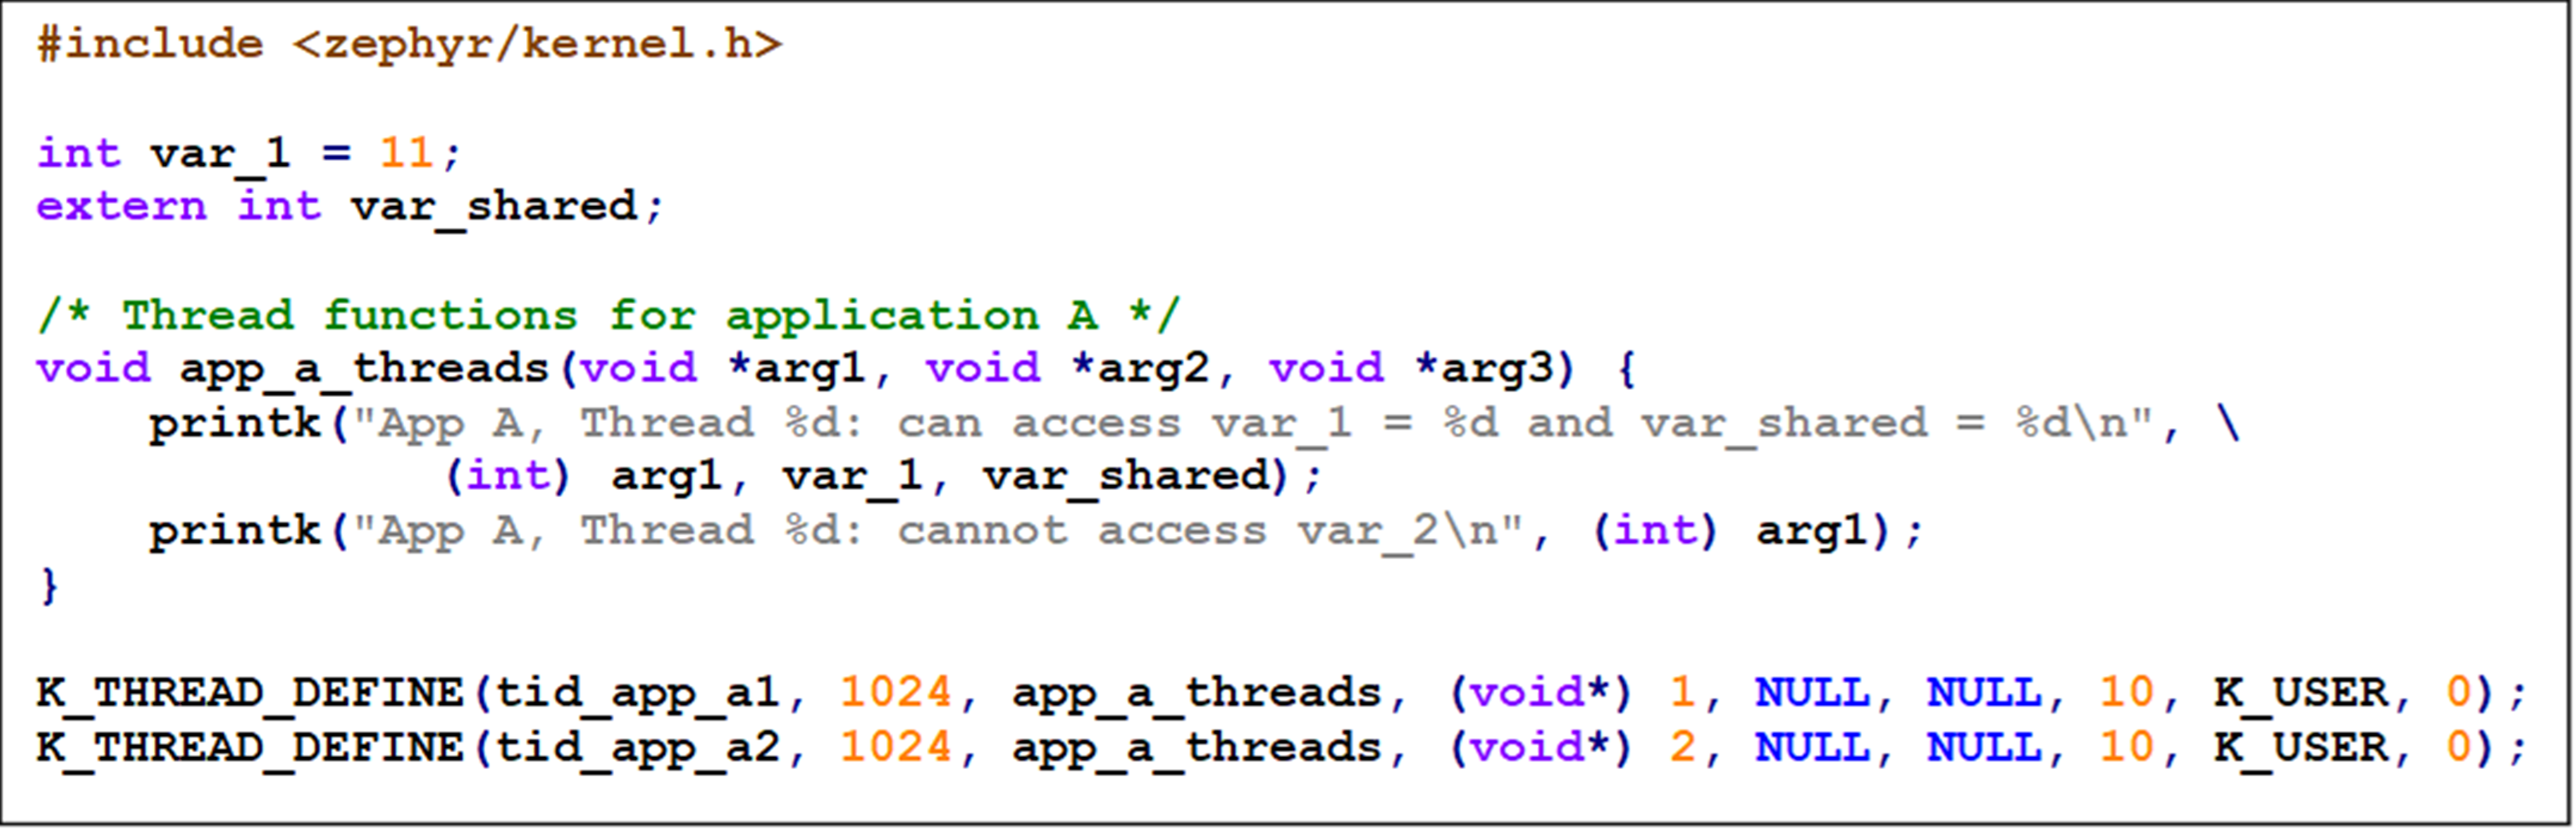
This is the app_a.c, the code of module A:
In the source code we do not need to tag variables to specify in which partition they should be added.
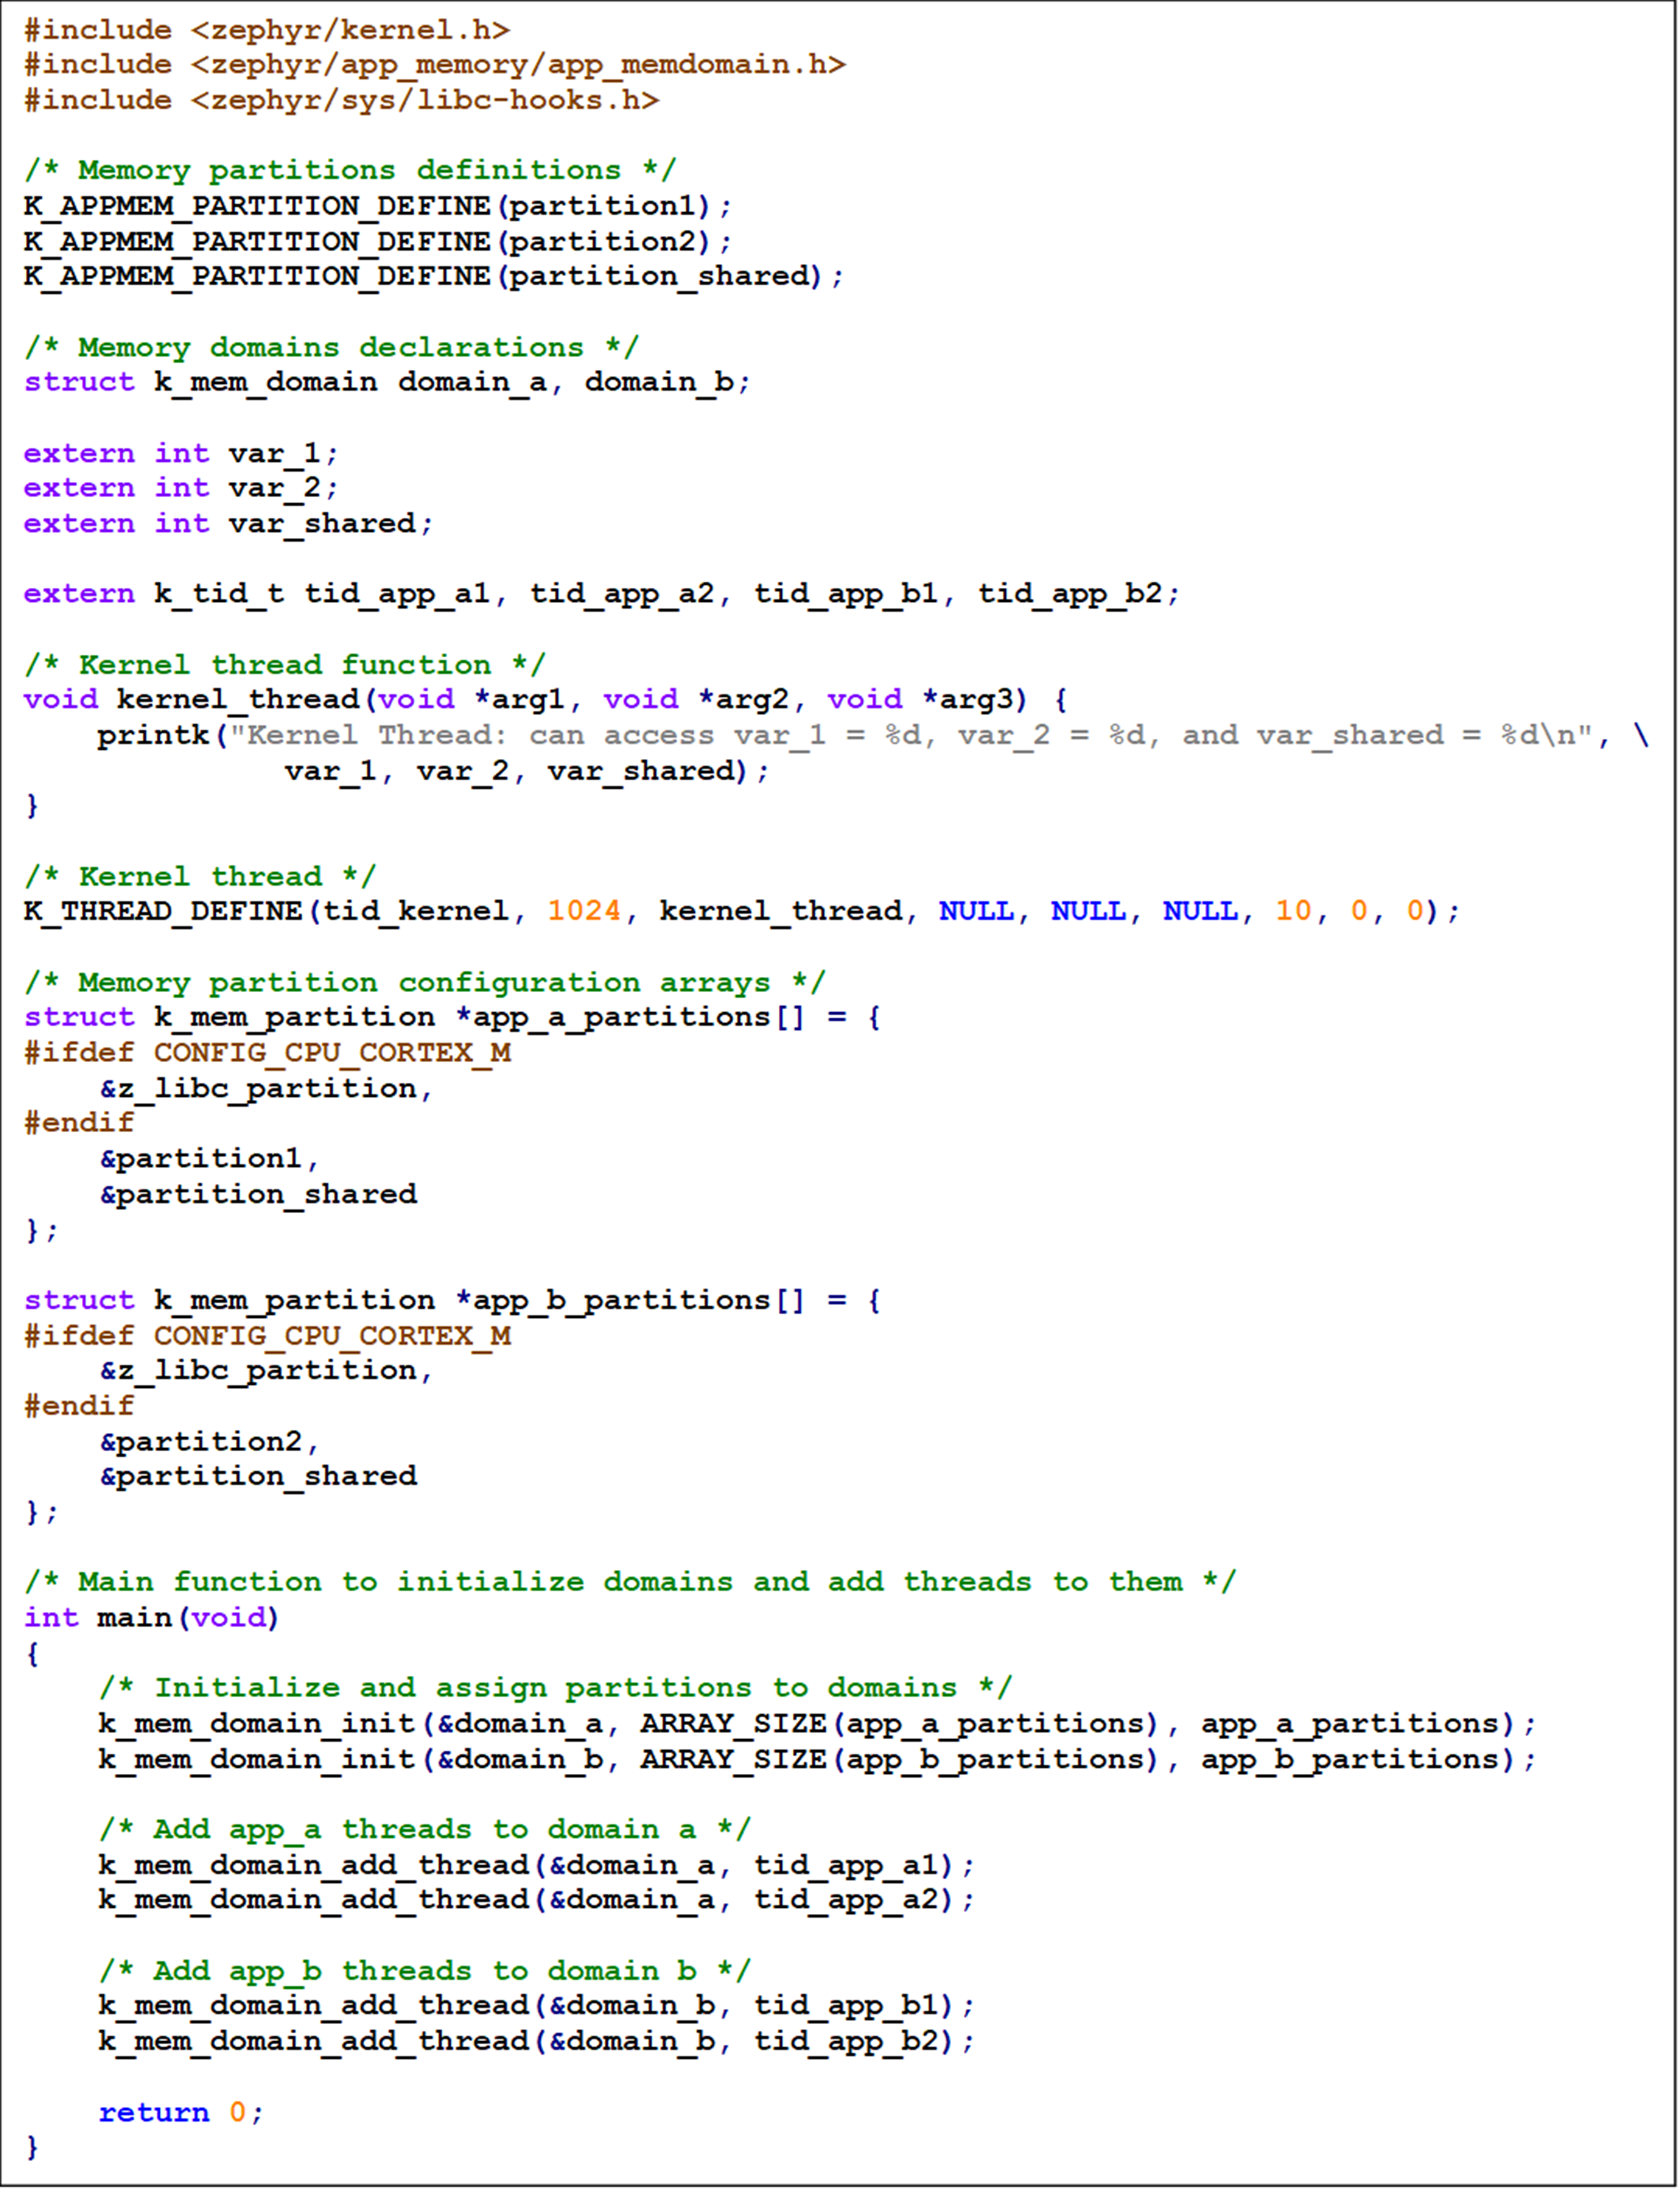
We should similarly define module B and a separate module for the shared variables; this module will only contain variable declarations.
In the main source code, we should define the different partitions and memory domains then assign them to the different threads.
Conclusion
By reorganizing logical applications into separate modules and using the Cmake function zephyr_library_app_memory(partition), we make development easier and safer. This method eliminates the need to manually specify where each variable should go, reducing the risk of mistakes and improving security. It also ensures that the boundaries between different parts of the application are clearly defined, making the application more maintainable and scalable. By following these steps, you can efficiently manage and scale larger applications in Zephyr, ensuring that your projects are both secure and well-organized.
In the following article, we will explain in simple words how to use user mode to manage access to kernel objects like mutexes, semaphores, and drivers. We will provide practical examples to demonstrate the typical ways of using these features.
If you want to learn more about Zephyr, check out our comprehensive Zephyr training course, covering everything from fundamentals to advanced topics. Click here for more information.