Written by Jared Wolff, Hardware and firmware enthusiast and proud father of the nRF9160 Feather

This blog originally ran on Jared’s blog. For more content like this, click here.
It’s not uncommon when developing IoT devices run the devices using different environments. For example, you may have a test server for working out the bugs in both your firmware and cloud interface. You may also have a dedicated production server which will run customer applications. As you can imagine, switching between the two can get hairy and error prone. One way we can fix that problem is through some crafty configuration management.
In this post, i’ll review some of the easiest way you can organize your projects for sanity (and fun!) So fire up your favorite text editor and let’s get rolling!
boards directory
The boards directory is a modern addition to Zephyr. Located usually in <your project root>/boards, you can add configuration and device tree overlay files. Zephyr uses these files to configure the compilation pipeline and also used to enable/disable certain features. You should check out the talk I gave about device tree and setting up hardware at the Zephyr Development Summit. (Should be posted here very soon.)
These files usually contain same name as your board (ex. circuitdojo_feather_nrf9160ns.conf and circuitdojo_feather_nrf9160ns.overlay). Let me explain more about each so you have an idea of how to take advantage of this great feature of Zephyr.
.conf files help you define board specific configuration variables. This allows you to turn on and off features if they’re needed by your board.
For example, in order to get the best low power sleep current the accelerometer needs to be enabled (counterintuitive I know):

The reason why we enable the device is because Zephyr has built in power saving capabilities for devices. Additionally, we enable it in order to disconnect the pull-up connected to the LIS2DH12TR SA0 pin. (More on that in a second!)
.overlay lets you edit your device tree entry for your device. Imagine it as a way of creating application specific patches to the .dts files placed in the zepyr/boards directory.
For the above example, the accelerometer needs to be defined in the device tree along with the disconnect-sdo-sa0-pull-up flag:
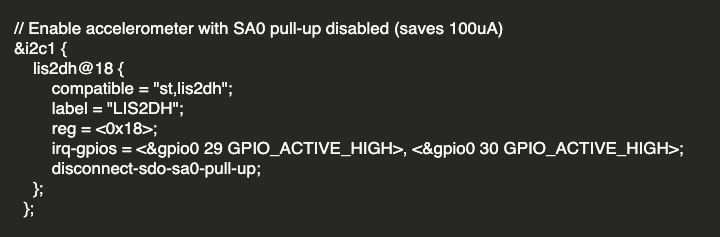
This flag disables the SA0 pull-up (25k) which will draw ~135µA no matter what. That’s no bueno especially when it comes to low power applications! When optimizing for low power on the nRF9160 Feather, this was the last step from going to about 150µA to about 35µA. (Nearly a 5x improvement!)
I will add that by default Zephyr will look for a directory called boards in your project root. For the following sections, that is not the case. So we’ll need to make sure that Zephyr knows about them using CMakeLists.txt.
Let’s talk more about how we can split up our prj.conf specifically in the next section.
conf directory
While you can specify all your configuration variables in prj.conf you don’t need to. In this section we’ll create a folder called conf and put all our remaining sub-configuration files in here. Then, depending on environment variables set during compilation, we can make Zephyr pick the right one for the job making your life simpler.
Backend
One way you can differentiate the configuration variables between production and development is by using different .conf files. For example, you could have a dev.conf and a prod.conf. If you’re running Amazon AWS you can set the Broker Host Name for MQTT using
CONFIG_AWS_IOT_BROKER_HOST_NAME.
For example you can set your test endpoint in dev.conf:

While you can set your production endpoint in prod.conf

Then you can configure which file to load by using some simple logic in CMakeLists.txt:
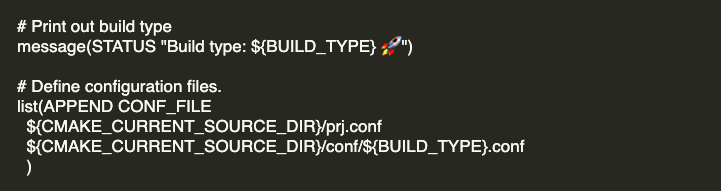
In this case i’m using BUILD_TYPE to determine what file to import. BUILD_TYPE simply is used as the prefix of the .conf file. Setting BUILD_TYPE to prod will cause CMake to look for prod.conf.
Not defined? No problem. You can add a check and set a default value for BUILD_TYPE like so:

This way when you’re building your project with west you’ll always have a safe default so things don’t break! Remember, you’ll want to put this entry before importing/running list(APPEND within CMakeLists.txt.
MCUBoot
If you find yourself needing to configure MCUBoot, there is no need to edit the files within the zephyr/bootloader folder. You can create .conf and .overlay files just like you can everywhere else in Zephyr!
For example, you can edit your device tree using an .overlay. For example here’s circuitdojo_feather_nrf9160ns.overlay from a project i’m working on:
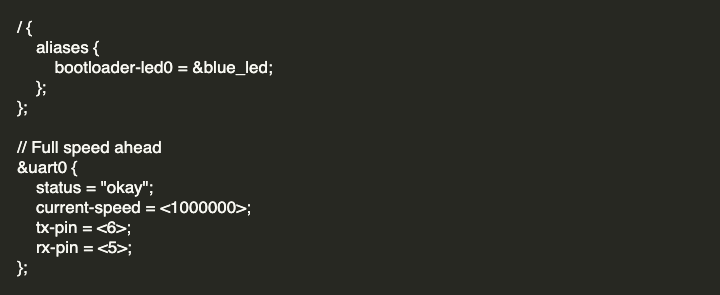
I’m adding an alias for bootloader-led0 since it’s not included in the version of Zephyr i’m using at the moment. (Upstream has it so this is a temporary fix)
Also, importantly, since the nRF9160 Feather requires MCUBoot to use 1M BAUD, i’m also setting that here along with the TX and RX pins.
In order to use these .conf and .overlay files they’ll need to be imported in your project’s CMakeLists.txt. Here’s an example:
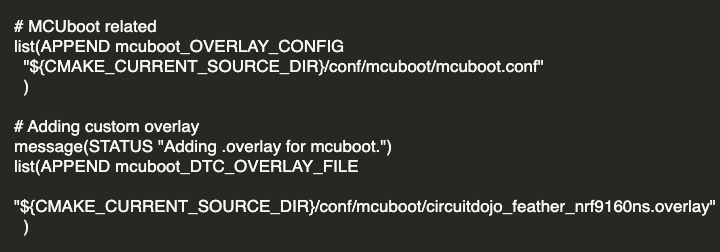
Specifically, Zephyr looks for mcuboot_OVERLAY_CONFIG and mcuboot_DTC_OVERLAY_FILE in order to append any further overlays for the MCUBoot compilation process to use.
Summing it up
Wrangling Zephyr’s configuration system is just one of the important facets that you’ll need to master in order to get the most of this amazing RTOS. Understanding CMake and how west works is critical for your success in using Zephyr. You should now know that you can add board specific overlays, environment specific configurations and MCU configurations/overlays with ease. Give it a shot and let us know how it goes on Discord!