Written by Rajeev Piyare, Founder of Conexio Technologies
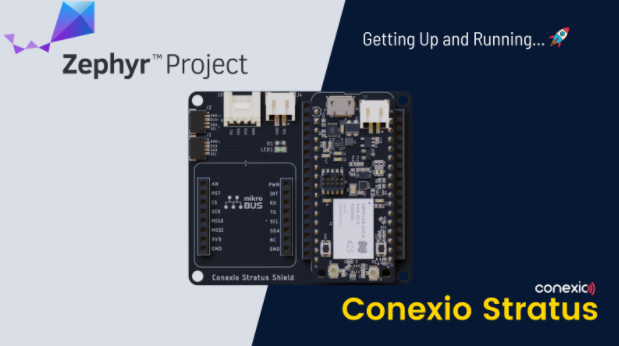
A glimpse of Conexio Stratus
Conexio Stratus is a new nRF9160 based cellular development kit from Conexio Technologies in a tiny feather-like form factor soon joining the Zephyr boards family. Although there are already a few boards out there based on nRF9160 SiP from Nordic Semiconductor, the following perks make the Stratus stand out:
- Built-in solar energy harvesting feature to make IoT applications self-reliant and energy-autonomous. No need to worry about battery replacement!
- Out-of-the-box IoT connectivity with prepaid cellular data of 500 MB and 250 SMS valid for 10 years, enabling developers to focus on their application and product rather than the connectivity or cellular contracts.
- A dedicated shield equipped with standard MikroBus™, QWIIC, and Groove connector to extend the board functionality and easily interface over 900+ sensor modules.
- Conexio Studio: a VS code extension to accelerate code development and debugging.
In addition, Conexio Stratus also supports cloud platforms like
- Edge Impulse, to provide machine learning (ML) capabilities at the edge. ML capabilities are becoming extremely helpful in implementing predictive maintenance in scenarios where uninterrupted operation is particularly important, such as in smart factories.
- Memfault and Golioth for remote debugging and Over-the-air (OTA) update to the remote devices.
Furthermore, Conexio Stratus also connects to the Datacake via the MQTT protocol. Datacake is a low-code IoT platform that requires no programming making data visualization and dashboard creation easy.
All of the above makes the Stratus a perfect candidate for connecting existing projects to the Cloud or as a gateway to connect other local endpoints without having to worry about the infrastructure cost, making it useful for both professionals and hobbyists.
This post…
Walks through getting started with the ZephyrRTOS on the Stratus kit. A versatile board needs a versatile operating system. To get the full functionality out of this device, Stratus relies on the nRF Connect SDK that bundles the ZephyrRTOS. We will give a quick look at the toolchains required and how to install them, how to select the Conexio Stratus board, and where to fetch the sample applications to get up and running in no time.
Setting up the Toolchains
nRF Connect SDK Installation
To make nRF Connect SDK installation a breeze, follow the following steps.
- Download and install a cross-platform tool nRF Connect for Desktop for your operating system.
- Install and run the nRF Connect tool on your machine.
- Click Install next to the Toolchain manager as shown below.

Once the Toolchain manager is installed, click Open.

The Conexio Stratus apps are currently compatible with nRF Connect SDK v1.7.0, therefore, select nRF Connect SDK v1.7.0 and click Install. Depending on your internet speed, it may take a few tens of minutes, so go and grab yourself a cup of coffee ☕

Once the installation is complete, click the dropdown menu and hit Open Terminal.

This will open the terminal in the installed directory of the nRF Connect SDK as indicated. In our case nordic/ncs/v1.7.0.
MBP:v1.7.0 $ pwd
/opt/nordic/ncs/v1.7.0
Hooray🎉 . You have completed the first milestone.
newtmgr Setup
newtmgr is an image management tool that can be used to interact with the bootloader and images on the device. newtmgr will be used to load the application firmware via the USB serial interface to the Stratus device. For full details on the newtmgr tool and the entire command set, see the official newtmgr documentation.
Installing newtmgr
For details on installing the newtmgr tool on your operating system of choice see:
Connection Profiles
The newtmgr tool works with connection profiles, such as serial or BLE, depending on how you wish to communicate with the device under test. Before you can use newtmgr to program your Conexio Stratus device, you will need to set up at least one connection profile, as described below. This makes it easier to update your device every time needed. Fire up a terminal window and enter the following command:
For macOS/Linux:
newtmgr conn add serial type=serial connstring='dev=/dev/tty.usbserial-DM03JJKC,baud=115200'For Windows:
newtmgr conn add serial type=serial connstring="dev=COM2, baud=115200"Note: The serial port or the COM port should match that of the connected Conexio Stratus board to the USB port. If you want to add other connection profiles, you can add those as:
newtmgr conn add serial1 type=serial ...
newtmgr conn add serial2 type=serial ...
Once the device serial profile has been added, you can verify them by listing all the defined connection profiles via:
newtmgr conn show
Connection profiles:
  serial: type=serial, connstring='dev=/dev/tty.usbserial-DM03JJKC,baud=115200'
Building and Programming Applications for Conexio Stratus
Before we can compile and flash the application firmware to the Stratus device, we need to gather a few files for this board. First, we need to install the board definition files or the board’s devicetree in the ZephyrRTOS. Zephyr utilizes devicetree to describe the hardware available on its supported Boards, as well as that hardware’s initial configuration. An introduction to the devicetree is well documented here.
Secondly, we will also download the sample application examples for the Stratus kit that comes pre-configured for this board.
Fetching Conexio Stratus Board Definition Files
Since the Conexio Stratus board definition files are still being reviewed by the ZephyrRTOS maintainers to be included in the mainstream, developers are asked to directly download the board files either in zip or tarball format, extract, and copy the conexio_stratus folder and place it in the NCS directory:
ncs/v1.7.0/zephyr/boards/armou should now see a folder named conexio_stratus among other supported board files. Using the board target as conexio_stratus_ns you can build Zephyr applications for the Stratus board in non-secure mode.
Fetching Sample Applications
All the sample applications for the Stratus board can be found in the conexio_stratus_firmware repository on Github. The fastest way is to download the files, extract, and place the extracted folder into:
/opt/nordic/ncs/v1.7.0Your nRF Connect SDK v1.7.0 folder structure should now look like this:
v1.7.0/
├─ bootloader/
├─ conexio_stratus_firmware/
├─ mbedtls/
├─ modules/
├─ nrf/
├─ nrfxlib/
├─ test/
├─ toolchain/
├─ tools/
├─ zephyr/
We have now met all the requirements for compiling applications for the Conexio Stratus.
Building an application: the wild wild West way
west is the swiss-army knife command-line tool for Zephyr. Zephyr provides several west extension commands for building, flashing, and interacting with Zephyr programs running on a device.
To build an application, navigate to the conexio_stratus_firmware directory that we installed above and choose a sample application. Here we will choose the led_blink sample.
/opt/nordic/ncs/v1.7.0/conexio_stratus_firmware/samples/led_blinkThis sample tests two different functionalities of the Stratus device:
- The user-programmable BLUE LED on the mainboard and the Orange LED on the shield.
- That the serial communications are working correctly and the output gets printed on the terminal window.
To compile the application, open a terminal window in the application directory and issue the following west command:
west build -b conexio_stratus_nsIn case, you do not want to recall the west commands every time, the Conexio team has also included a python script (generate_firmware.py) to generate the Stratus device firmware with all their samples. Simply command the following in the terminal and it will take care of the rest.
python3 ./generate_firmware.pyUnder the hood, the script simply invokes the west shell command using the system() method in python. Make sure that you have Python 3 installed. If not, now is the time to upgrade!
Flashing an application: DFU Mode (Device Firmware Upgrade)
Stratus device comes preprogrammed with the MCUBoot bootloader allowing users to directly update the firmware via the USB interface. Each sample is already configured to enable the Zephyr application to be booted by the MCUBoot after resetting the board.
This is handled internally by the Zephyr configuration system and is wrapped in the
CONFIG_BOOTLOADER_MCUBOOT Kconfig variable, which is enabled in the application’s prj.conf file as:
CONFIG_BOOTLOADER_MCUBOOT=yMore information can be found here.
After the compilation has been completed, you will notice a build folder being generated, which will contain the following binary:
build/zephyr/app_update.binNote: When an application is built with the option CONFIG_BOOTLOADER_MCUBOOT set, app_update.bin, a signed variant of the firmware in binary format (as opposed to intelhex) is automatically generated and can be used for firmware over-the-air (FOTA) upgrades.
To program the Stratus via USB, you will need to put the device into DFU mode first. This mode triggers the onboard bootloader that accepts firmware binary files.
To enter DFU mode:
- Hold down BOTH the buttons
- Release only the RESET button, while holding down the MODE button
- Wait for the blue LED to turn on (steady-state)
- Release the MODE button
The device now is in DFU mode. 🚨
Flash the compiled firmware using newtmgr:
newtmgr -c serial image upload build/zephyr/app_update.binGive it a few seconds for the transfer to complete and then, hit the RESET button. You should now see the LEDs blinking every second. If you have a serial logger such as TeraTerm or similar, select the correct COM port and set the baud rate = 115200, hit the RESET button, and notice the following being printed on the console window:
SPM: NS image at 0x20200
SPM: NS MSP at 0x20015528
SPM: NS reset vector at 0x21a31
SPM: prepare to jump to Non-Secure image.
*** Booting Zephyr OS build v2.6.99-ncs1  ***
Hello from conexio_stratus
Now you are all set! Stratus is alive and ready for development.
Compatibility with nRF Connect SDK for VS Code
To make zephyr-based application development a breeze, the Stratus board is also compatible with the newly released nRF Connect SDK extension for the VS Code. Please refer to our previous blog on how to get started with nRF Connect for VS Code and its powerful features or watch the walk-through video tutorials from Nordic Semi on YouTube.
Adding an existing application to nRF Connect for VS Code
Once you are all set with the nRF Connect Visual Studio Code Extension Pack installation, start the extension in the VS Code.
Note: Installing nRF Connect Visual Studio Code Extension Pack will also install all the required dependencies.
Next, click the Open welcome page on the left pane and you will be greeted by the nRF Connect VS Code Home Screen. The Home screen presents step by step walkthrough to link the toolchains and the nRF Connect SDK version.

Expand the Quick Setup configuration menu by clicking on it. Then select the nRF Connect SDK v1.7.0 that’s already on your machine followed by the associated NCS Toolchain version. Here, the nRF Connect SDK version is v1.7.0 and the corresponding toolchain that comes with it.

We will now add the Conexio Stratus sample application by first clicking on Add Application. This will open the file browser on your machine. Navigate to the location where the led_blink resides (ncs/v1.7.0/conexio_stratus_firmware/samples/led_blink) and click add.

On the left pane, under APPLICATIONS, you should now see the ported application.
Compiling an application using nRF Connect Extension
Prior to compiling our sample application, we need to first generate the device build configuration for our project, by clicking on Click to create one option as shown below:

This opens a new tab, asking the user to select the board for which the build configurations will be generated. In our case, we will select the board as conexio_stratus_ns for the non-secure domain with the Build directory name as build.

Next, click Build Configuration to start the Zephyr application build process. Now, you should see the build process kicking in the background and generating the required files and binaries for the led_blink sample application.

Once the project is compiled successfully, in the project navigation panel, you will see all the generated files.
Well done! You have successfully managed to compile the sample application within the nRF Connect extension.
Flashing an application
To update the Conexio Stratus firmware, we now have two options at this point:
- Open the terminal within the nRF Connect extension and invoke the
newtmgr -c serial image upload build/zephyr/app_update.bin
as shown, making sure the device is in DFU mode or

2. Upload the firmware using the Flash button in the nRF Connect SDK for VS Code. For doing so, we will need to connect a JTAG programmer. The easiest way is to connect one of the Nordic developer kits, here, the nRF5340 DK from Nordic which will be used to flash the Conexio stratus kit connected via the JTAG SWD interface. Once the board is connected and recognized, it will get listed under the CONNECTED DEVICES tab as shown.


Next, click on the Flash button. nRF Connect for VS Code will upload the compiled code to the Stratus board after which it will then reset the device. Once again, you should see the LEDs blinking.

Conclusion
In this post, we have covered how to get started with ZephyrRTOS on the upcoming Conexio Stratus cellular IoT kit. Here, we have also covered how to set up the toolchains, compile, and upload the firmware to the device using both the command line method, i.e., west and newtmgr, and also the nRF Connect for VS Code extension via JTAG interface.
If you are curious, want to learn more, or want to grab your very own Conexio Stratus device, then check out their campaign page or visit the product page here. For further questions regarding Conexio Stratus, you can also join their Conexio Discord Channel.
If you have any questions or comments in general, please feel free to reach out on the Zephyr Discord Channel.
Happy Coding!